Prototype Mode
From the toolbar at the top, you can switch to Prototype Mode by clicking Mode Switch Button.
Prototype Mode offers Revision History / Project Workflow / Node Description page.
You can refresh scenario by clicking Reset Workflow and can build HTML Scenario by clicking Build Scenario.
And Refresh Thumbnail updates the page thumbnails that are included in the workflow and the page list.
Revision History
Display the history of revision made in the current project. You can add or change the history.
Add New Date: Create a new editable row field in the table.Remove Date: Delete the selected row from table.
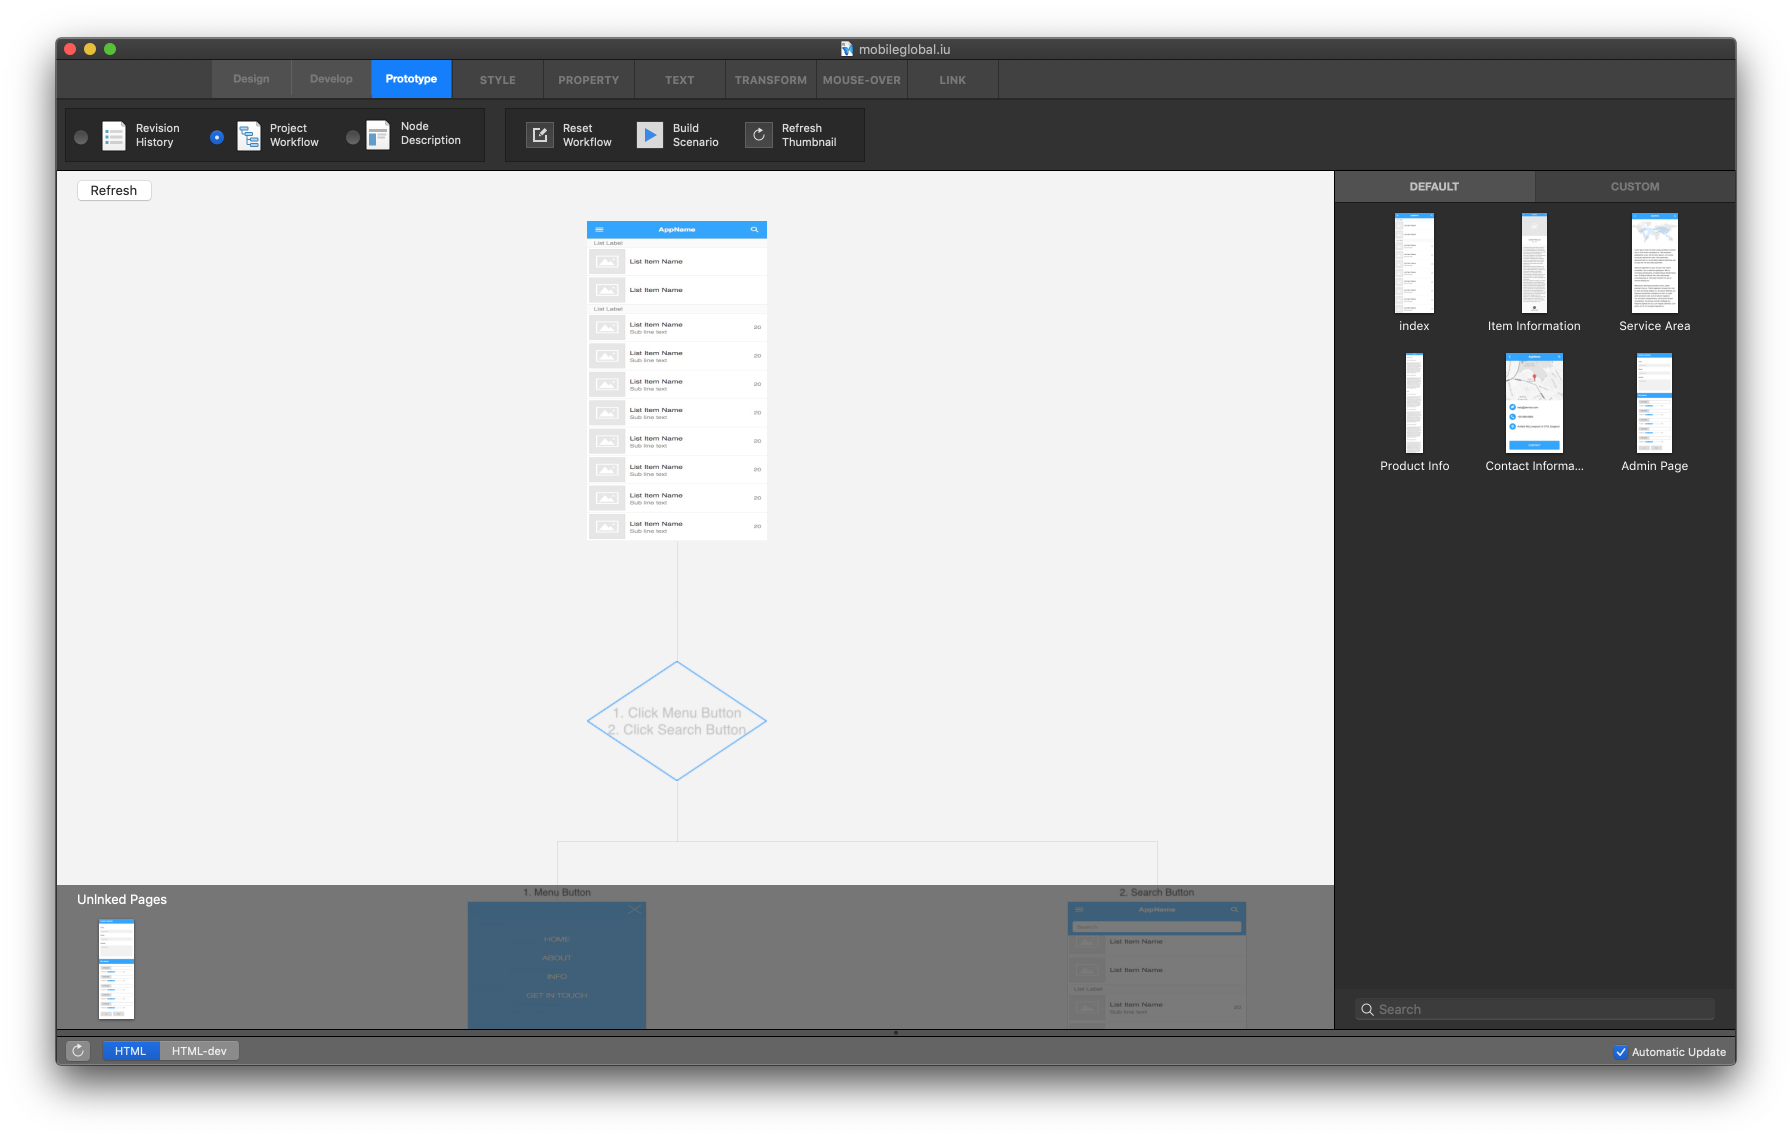
Project Workflow
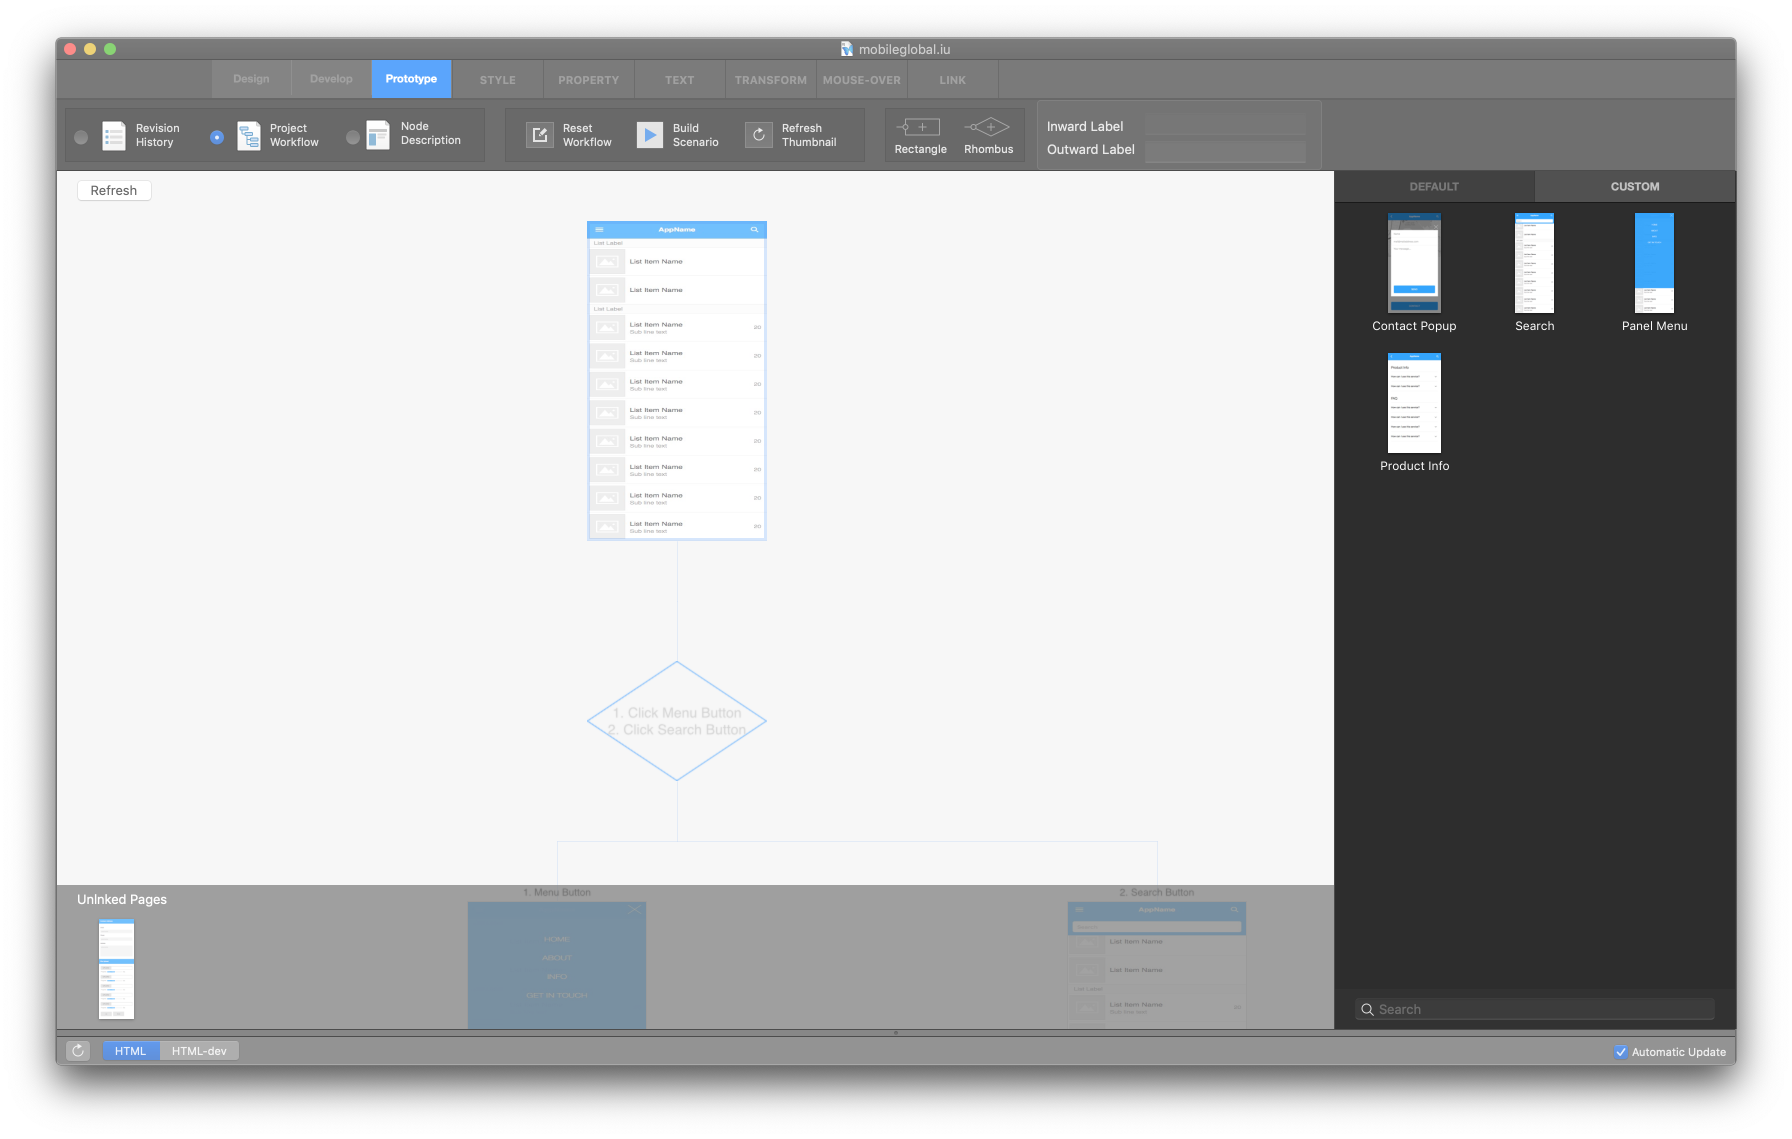
Display Workflow of the current project. Users can add nodes by drag and drop of page’s thumbnail. Press delete key to delete the selected node.
Default thumbnails: A list of page thumbnails included in the project.Custom thumbnails: A list of page thumbnails captured by using Page Capture Button on the toolbar in editor mode.
Note
Thumbnails can be added by using Page Capture Button in Editor Mode.
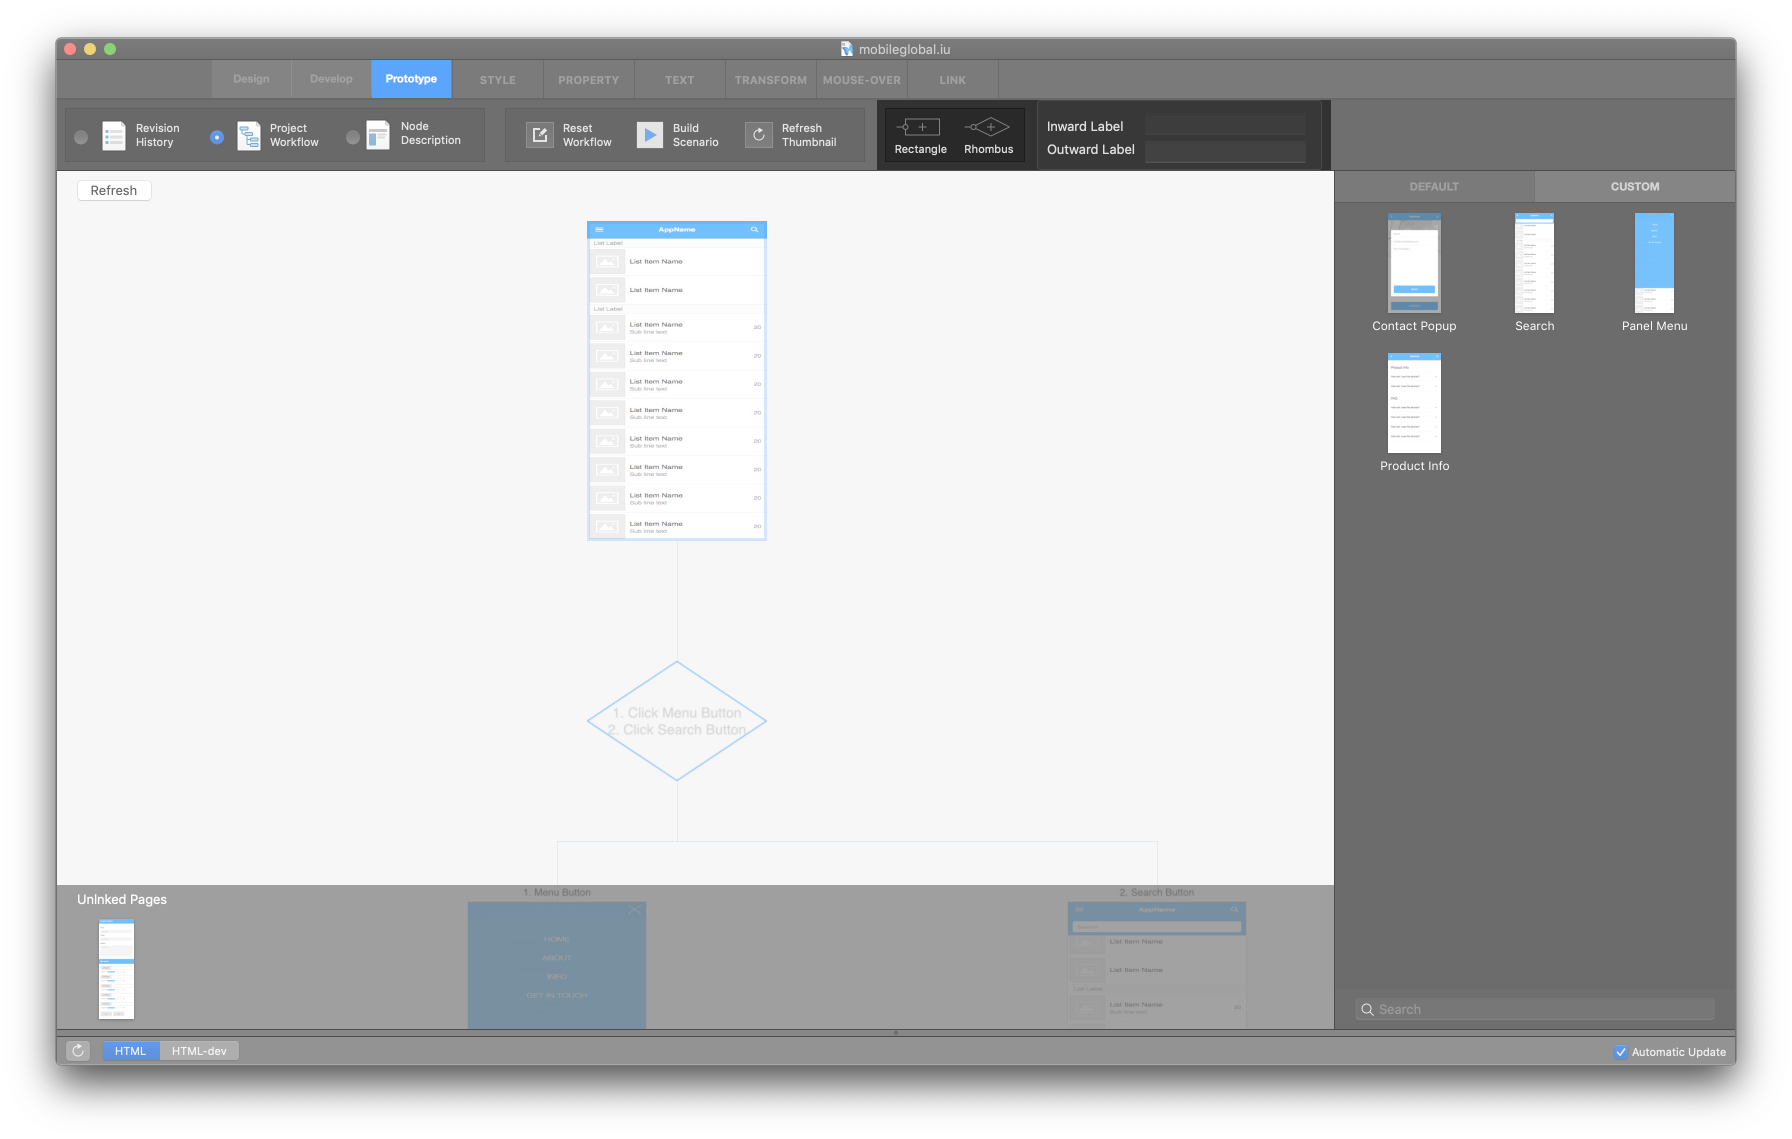
Rectangle Button: Add a square dialog below the selected node.Rhombus Button: Add a diamond dialog below the selected node.Inward Label: Add a label on top of the selected node.Outward Label: Add a label below the selected node.
Node Description

Display the Node Description of the selected page. By adding memos to the node, you can send orders to partners of your collaborative project. You can also add or change content in the Screen Description or Exception area. Double-clicking the thumbnails on canvas also displays the node description.
Memo image area: Select an image from the resource panel to replace the numbering in the screenshot area.Add Memo Button: Create a new editable row field in the table.Delete Button: Delete the selected memo in the table.
When you click the screenshot area, the number of the selected memo will appear.